Scanning the past – fifth update

I’ve continued scanning my slides over the summer but ran into problems with the Epson V700 slide carrier after I’d scanned 3-4000.

The carrier has little spring tabs which hold the mounted transparencies in place. Unfortunately they proved to be rather fragile, especially with slide mounts from the 1960s and 1970s which were a lot thicker than the slide mounts in later years. Slowly the tabs started to break and I finally had one or both sides of four of the twelve slide carrier holes damaged. They could still be used for old, heavy, rigid plastic slide mounts, but the thin paper and plastic mounts tended to be lifted on one side and the slides could move.

After much searching, I eventually found a supplier for replacement carrier who sold them at a reasonable price and could deliver to France (one well-known scanner supplier wanted 20€ for the carrier and the same again for delivery from Germany). As I still had an estimated 5000 or more slides to scan, I bought two carriers for 6€ each (and 15€ delivery; again from Germany) as I knew it was always possible I’d damage another carrier before I’d finished all my scanning.

The second barn renovation is finished

The work was finally finished in mid-October. We’ve had a good sort through all the stuff that used to be in it and done a lot of rationalisation. The freezers are now back, the washing machine and tumble drier which were sitting unconnected are now connected, and we’ve bought shelving to provide more sensible storage.

I’ve been photographing some of the progress and there are a series of panoramas here: https://www.blackmores-online.info/Second_barn/index.html The last panorama shows the second barn as it was on 13 November.

The second barn

Some of you will know the second barn as the main entrance to the west wing (the alternative being the ramp!) and the route to the terrace and fields.

As part of the work projects this year the second barn is undergoing a major refit to make it safer for us as we get older and for our visitors. So the uneven floor with drainage channel from the days when it used to house cattle is no more. Instead will be a tiled floor and plaster-boarded walls, revised lighting with more convenient switches and (hopefully) no more clutter. Without Alistair doing most of the hard work levelling the ready-mix concrete the rest would not have been possible!

I’ve been photographing some of the progress and updating this web site occasionally https://www.blackmores-online.info/Second_barn/index.html

Scanning the past – fourth update

Having scanned all the negatives in the main cardboard boxes where our print photo folders are stored (although I’m sure there are still some others), I had a break from scanning, partly because of the hot weather and partly to concentrate on the building work.

I recently restarted scanning, this time on the transparencies. Initially they were more difficult with the higher contrast and the different film types. The VueScan program has some in-built correction for different colour negative films but only distinguishes between Kodachrome and other colour slide films (Kodachrome uses very different dyes from other films and was purposely biased for projection with a tungsten light). However, having now scanned twenty boxes (so about 700 slides) I think I’ve resolved many of the difficulties (or at least am getting results which I think are satisfactory).

However the scanning seemed to be taking a lot longer at 10-13 minutes for each slide. I was also saving 48-bit TIFF files as well as JPEG files since the images were much more variable and differing in contrast and I thought I might do more editing on them. So it was taking about 2-2½ hours per slide carrier which contains 12 slides. Realistically that means I could leave the scanner to scan one batch of 12 slides between breakfast and lunch, another batch after lunch and early evening (or afternoon tea if I come in),  another two in the early and late evening, and a batch overnight – so often not even two boxes of 36-39 slides a day.

However I decided, as with the negatives, I could always rescan the slides which were of particular interest so have switched to saving 24-bit TIFF and JPEG files (as they are the quality required for prints) which has reduced the time per slide to about 7 minutes.

Scanning the past – third update

I finished the 150th colour negative film yesterday and the 4650th image.

Although I’ve not finished all the negatives, it seemed time to look back and, as a result, I’ve decided to rescan the first fifteen to twenty films as the quality isn’t as good as the later scans. The main problem was the way the film strip was placed in the holder. I started with the negatives in the conventional way, emulsion-side up, as a scan would give an image the correct way round. However there was a problem. The negative strips all have a slight longitudinal curl. Putting the negatives in the holder emulsion-side up meant the centre of the film was lower in the holder due to the curl. The scanner lamps (the scanner has two, a conventional white lamp for the main scan and an infra-red lamp which is used in the image processing to remove effects of dust) generate quite lot of heat as they are on and off for an hour for set of negative strips. This heat seems to have the effect of softening the film slightly and, as a result the film droops a bit more and pulls slightly at the sides out of the film holder. So quite a few of the earlier scans have a strip of the film edge showing on one or both sides. This also has the result the scanner colour and exposure value software calculation was incorrect due to a white or black side strip or perforations showing and the image quality was degraded.

After those first batches of films, I tried a film with the emulsion side down so the film curved upwards and used a setting in the scanner program to mirror the image automatically when it was processed. That setting was a lot better. Any softening of the film only meant the curve became less pronounced and the film strips all remained well-framed in the holder.

The holder has a height adjustment and I originally tried to compensate for the possible different focus between the lower centre and higher edges of the image by raising the holder. With the film the other way round this was no longer necessary.

I have found some of the strips of film are not cut accurately between the images. The processors must have made the original prints from a continuous film and them cut them to fit in the envelopes/folders, clipping the edge of some images. For important images it should be possible to recover the full image by “stitching” two images together and a little editing. Hopefully there won’t be many.

A new Michelin star

The Atelier du Peintre in Colmar received an étoile (also known as a “macaron“) in the 2011 France Guide, published earlier this week. We have dined there several times in the past few months and it has become a favourite.

A few years ago the chef Loïc Lefebvre and his partner Caroline Cordier were hired, from a restaurant in the south of France, by a Scottish business millionaire to start a new restaurant in Inverness, with the aim of getting a Michelin star. Somewhat unsurprisingly the locals didn’t visit it in any numbers and it lost money. The restaurant got the attention of Gordon Ramsay in his Kitchen Nightmares television series (La Riviera, Inverness 14 June 2005 – after our first visit we found the programme on YouTube). There were several makeovers and a change of style with a more bistro-style lunchtime restaurant and a continuing separate evening restaurant – not really those suggested by Ramsay. With the changes, the bistro style became more successful and another restaurant in the same style, managed by the couple, was opened in Edinburgh. In 2007 there seems to have been a row between the French couple and the businessman and they walked out. They started their own restaurant, the Atelier du Peintre, in Colmar in summer 2009.

Slightly more surprising was the lack of any recognition (or even a mention!) in the new Michelin guide for the Auberge de la Ferme Hueb in Marckolsheim run by the former chef of the Blanche Neige (it has a similar ranking to the Atelier in the Gault Millau guide). But that is probably the ambience not being up to Michelin standards; the quality of the food certainly has been on all our visits. The chef, Mike Gemershausen, has picked up several awards in the last year. It will be interesting to see what happens in the coming year and whether he spreads his talents too quickly and thinly. He has now bought a hotel-restaurant just across the Rhine from Selestat in Germany and also become a partner in another hotel-restaurant across the Rhine from Strasbourg. The Ferme Hueb is rented but there has been no indication it is closing so presumably he will put in another chef.

Photographs of some of our meals at the Atelier du Peintre and the Auberge de la Ferme Hueb

Scanning the past – second update

I scanned the 4000th negative this morning.

Unlike digital camera images, the scanned images do not have any rotation data to allow viewing programs to turn them to the correct landscape or portrait orientation. All the photos in landscape mode on the 35mm negatives need rotating through 90°. Because of the way the film has been cut into strips and the need for a small blank inter-image strip at one end to go under a clip so the whole of the first image is scanned, the negatives might be loaded either way round into the holding frame adding to the possible need to rotate portrait images through 180°. Although Picasa can be used to rotate images in the viewer it does not store the image rotation information so if the image is opened in another program it appears un-rotated (even re-saving in Picasa does not seem to work unless you also edit the individual images in some way). Having looked at several programs which can rotate an image without loss or change to the JPG file, I have chosen a program called EXIFPro. It allows images to be displayed in a wide range of sizes which can be useful when trying to decide which way an image needs to be rotated. It is easy to rotate multiple images at the same time and has several other useful functions.

I also need to add various information to each of the individual JPG files to aid identification of the photo in the future (how I wish all the photos I’ve inherited or even our photos had something written on the back!) and to allow searching of all the photos e.g. for those containing particular individual or of a place. Again, I could have used Picasa to add a “caption” and tags but it does not use a comprehensive set of fields for the data and the fields it uses are not completely compatible with some other programs. So I have opted to use a program called iTag which allows me to add information (title, description, date, author, copyright, and an unlimited number of text tags) to the IPTC section of the JPG file. iTag has a tag manager so allows better control of the tags and it should be possible to label the images in a more standardised manner than is possible with other programs. At present I’m mainly adding text tags (including date, if I know it); again these can be added to multiple images at the same time using iTag.

Scanning the past – first update

It took several days to get used to the new Epson V700 scanner, to sort out the best settings for the scanner, and to decide how the scans would be named and saved. I ended up abandoning both the Epson and SilverFast SE software which came with the scanner as they both seemed inflexible and the SilverFast has one of the worst user interfaces I’ve seen. Instead I bought a copy of the well-respected VueScan; something I’d anticipated I’d probably have to do after all my readings of reviews.

I decided to start by scanning the colour negatives. Helen had previously done a good job of labelling many of the envelopes and sorting many into year bundles so identification will be easier than many of the boxes of slides.

One problem I have found is with the plastic tape used by the processors to join the individual films before they pass through the processing machine. In some cases, after many years, the adhesive on the tape has “bled” and, when the film strips were stored together rather than in individual strip wallets, stuck to the next negative strip. I’ve usually managed to unstick the strips and to remove traces of the adhesive with very gentle rubbing but in some cases it is firmly stuck to the image side of the negative strip and I suspect I’d damage the image trying to remove it. I’m now cutting off the plastic strip off all films before the negatives go back into storage.

Another problem has been dust! It seems to appear all the time. I bought several microfibre cloths to wipe the negative strips and the glass plate of the scanner but, even so, there is usually a sprinkling of dust on the glass plate after scanning a set of negatives. I’m not sure whether lint-free gloves would also help. I’ve also dug out my old Zeepa “electronic static eliminator” which I originally bought to eliminate dust-attracting static on LPs.

The scans are being made at 3200dpi which, for a 35mm negative, gives an image of 4473×2960 pixels with the settings I’m using; I’m saving them as JPG files at 96% quality giving a file of 3.5-5.8Mb (equivalent to about a 12Mb digital camera). I have the option of saving as 16-bit TIFF but those files are over 80Mb; As the majority of the photographs are snapshots I decided I could just rescan and save those images with more merit as TIFF files at a later date.

After a month I’ve now scanned over 3400 images (115 films), so I’ve probably done at least a third of our colour negatives. There have been more 36 exposure films than I thought (I’d originally remembered using 20 or 24 exposure films) but there seem to be fewer films per year. Where the original photographs were very sharp, the scans are also very good and show fine detail; it seems the scanner settings I’ve got are working well (click on the images to see larger, but not full scan-size, versions).

For backups I’ve bought a ReadyNAS Duo network storage device with two 1.5Tb disks configured as mirrored RAID disks. The disks are synchronised and store exactly the same data. If one disk fails the other will continue to allow backups; when the failed disk is replaced it will be synchronised automatically with the good disk. I’ll make further backups from the ReadyNAS to external USB disks and keep one in the safe and one elsewhere. Had we had a fast broadband connection I would probably have opted for one of the online storage systems as they seem very cost-effective. I tried one, Diino (because it allowed you to back up multiple computers to the same account without incurring additional per workstation charges), but our internet upload speed is so slow (68kB/s = 0.68Mb/s) it would have taken about six months just to backup all our current data!

I’ve also added a gigabit (1000 Mbit/s) network switch to speed up the Ethernet connections between computers and to improve backup speed. It connects at 100 Mb/s to the broadband router (wired/wireless routers only run at 100 Mbit/s). Without the switch our network ran at 100 Mbits/s as all data went through the router. Now all our local network traffic goes through the gigabit switch and only the internet traffic goes through the router.

It was interesting to look back at how much data I created in the past when I reorganised the backups. I bought my first PC in 1990 and have kept backups ever since. The snapshot for 1990-Sept 2003 period (pre-digital camera) shows my total data backup was about 300Mb. My current backup archive, which is updated daily, is now about 300Gb (excluding program files); the scans are adding 300-500Mb/day.

Scanning the past

I bought my first 35mm camera when I was about sixteen (a Werra 1C) and used B&W film developed both as negatives and as positives. Colour film was rather a luxury but I did use some slide film at university and for holidays. I switched completely to slide film from B&W in the late 1960s. And I started using 35mm colour negative film for the majority of my general snapshot photography rather than colour slide film in the late 1970s although I continued to use slide film for major trips, e.g. to southern Africa, Peru and India.

We don’t really look at the old prints, except those in albums, as they aren’t really accessible, being stored in boxes with only rudimentary labelling. And the slide projector doesn’t come out very often!

A couple of weeks ago, after experiments a few years ago with my Canoscan 3200F scanner to check the feasibility and after reading many reviews, I finally opted to buy a high-resolution Epson V700 flatbed scanner to scan all our negatives and transparencies (and any prints we have where the negatives no longer exist).

Scan of the 6 x 4 faded print from July 1980

Scan of a 6″ x 4″ faded colour print from July 1980

I’ve no definite idea how many images there are to scan. However,  even if I used only one colour negative film a month between 1980 and 2004 (when I got my first digital camera) there could be about three hundred 24 or 36 exposure films equating to 6000-10,000 negatives. I estimate there are possibly over 8000 transparencies. And then there are also my B&W negatives and positives from the early 1960s onwards together with some colour negatives from our parents (we also seem to have the 110 and 35mm negatives from some films taken by Toby and Leila). So I guess the total could be near to 20,000.

Unfortunately, many of the colour negative prints from the time Toby and Leila were born now have more of an appearance of orange-sepia prints than colour prints. This must be due to poor processing by one particular processor; prints made by other film processors have negligible fading. But fortunately none of the negatives I have looked at have faded or show significant loss of colour.

Epson V700 3200dpi scan from negative

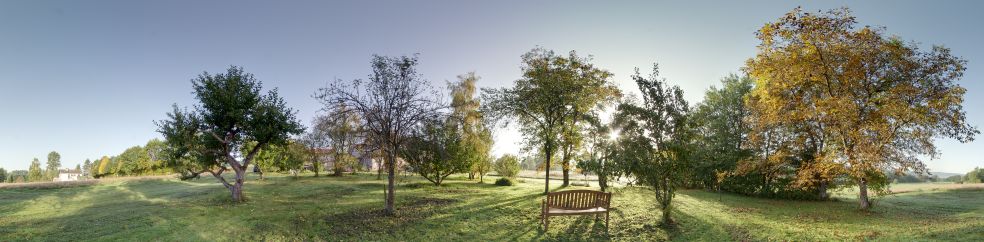
Low resolution Epson V700 scan from the negative

The Epson film holders take four strips of negatives or twelve slides so, since it takes about 4 minutes for each high definition image scan (at 3200dpi – approximately equivalent to a 12MP digital camera image – although some of the earlier colour print film is rather grainy so the quality isn’t really that good), I can just load a set of images and leave it to process for an hour or so.

As it is not very easy to identify which are good or bad images from the negatives it is not really feasible to be selective in the images to scan. So I have decided to scan them all. And, since disk space is cheap I’ll probably scan all the slides as well, even though the quality is more easy to recognise, and then keep all the scanned images since all the images will only use around 100Gb disk space (I’ll also have multiple backups both here and elsewhere). Using other software it will also be possible to label/index the individual images either in bulk or individually to allow searches.

Hopefully we’ll then have a good digital archive. We, the children, and others will be able to relive their past through full sets of images rather than just the few prints that are stuck in albums.

But scanning could take a while ….. given the winter weather there is little incentive to venture outside so I’m currently managing about 80-100 image scans a day.

An effect of the snow?

When I went out today, after the snow had melted, to top up some of the bird feeders, I happened to glance at the orchard and it looked different. I then realised one of the old, large apple trees had fallen over, roots broken. Possibly due to the weight of the snow? Unfortunately in has landed on a Worcester apple tree we planted about ten years ago which has just started to fruit profusely.

If you click on the image and hold down your left mouse button you can drag the image around in all directions. You can use the Shift and Ctrl keys to zoom in and out

[swfobj src=”https://blackmores-online.info/landscape/Orchard12Dec2010-small.swf” width=”400″ height=”300″ allowfullscreen=”false”]

Click this link Fallen apple tree in the orchard, 12 December 2010 to view in full screen mode. The full-screen panorama file is 3.6Mb in size.